Introduction
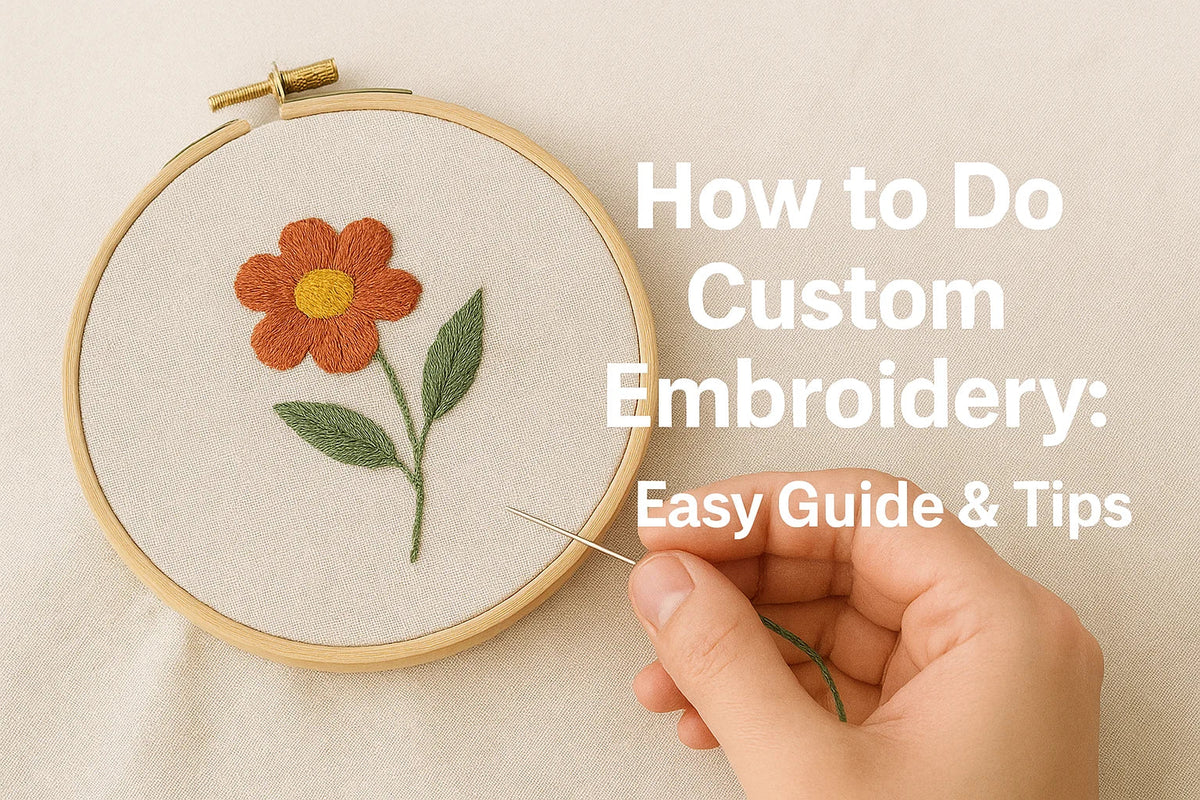
Custom embroidery is one of the most timeless and professional ways to personalize apparel. Whether you're creating branded uniforms, promotional merchandise, or personalized gifts, embroidery adds a durable, elegant touch to any garment.
For beginners, learning how to do custom embroidery may seem complex—but with the right tools, techniques, and guidance, it becomes a rewarding skill that can elevate your apparel projects. Many creators also combine embroidery with other custom clothing printing methods to produce standout designs that reflect their style or brand.
In this guide, you'll learn how to do custom embroidery step by step—from choosing the right tools and mastering basic techniques to avoiding common mistakes and understanding embroidery printing costs.
Key Takeaways
- Learn how to do custom embroidery using both hand tools and embroidery machines
- Discover the essential tools required for clean and professional stitching
- Follow a step-by-step process to prepare, test, and execute your embroidery designs
- Avoid common mistakes and improve your results with beginner-friendly tips
- Understand the cost factors involved in custom embroidery projects
What Is Custom Embroidery?
Custom embroidery is the process of stitching a design, logo, or text directly onto fabric to create personalized clothing or products. Unlike printing, embroidery uses threads to give your design a textured, durable, and professional look that lasts for years.
You can do custom embroidery by hand for small, personal projects or use an embroidery machine for larger or more complex designs. It’s commonly used for:
- Branded uniforms and workwear
- Hats, jackets, and bags
- Promotional merchandise
- Personalized gifts and fashion items
The main advantage of custom embroidery is its premium, long-lasting finish, making it perfect for businesses, small brands, or anyone who wants their apparel to stand out.
By using proper tools, design software, and embroidery techniques, you can create high-quality, unique products that reflect your style or brand identity.
Tools You Need for Custom Embroidery
Before you start stitching away, it’s worth getting familiar with the tools that make custom embroidery possible. Whether you’re crafting from your cozy home corner or setting up a custom embroidery shop, having the right gear is what makes the difference between “just okay” and “wow, that’s amazing!”

1):- Embroidery Machine or Hand Embroidery Tools
If you’re thinking about taking on bigger projects or bulk orders, investing in an embroidery machine is a game-changer. These machines do most of the heavy lifting and pair perfectly with embroidery design software to digitize your artwork, ensuring every stitch lands exactly where it should.
Not ready for that leap yet? No problem. Hand embroidery tools—like needles, hoops, and marking pens—are perfect for small projects or personal gifts. They take more time and patience, but they can still produce stunning results.
2):- Embroidery Hoops and Frames
Think of hoops and frames as the “third hand” you didn’t know you needed. They keep your fabric in place, hold it tight, and stop it from wrinkling so your custom embroidery design looks clean and neat.
3):- Needles and Threads
Needles aren’t one-size-fits-all. Thicker fabrics like denim call for stronger needles, while delicate fabrics need something finer. When it comes to threads, polyester and rayon are crowd favorites—they’re strong, vibrant, and won’t fade after a few washes.
4):- Stabilizers and Backing Materials
Here’s a pro tip: never skip the stabilizer. It sits behind your fabric and keeps it from stretching or shifting while you stitch. You can choose from tear-away, cut-away, or water-soluble stabilizers depending on your fabric and design needs.
5):- Design Software (for Machine Embroidery)
If you’re using a machine, embroidery design software is your creative control center. Programs like Hatch, Wilcom, or Embrilliance let you tweak stitch types, adjust density, and perfect placement before you even start sewing. This process—called digitizing—turns your idea or logo into a professional, stitch-ready file.
Step-by-Step Process for Embroidery Printing
Whether you’re stitching a logo on a work shirt or creating a one-of-a-kind gift, knowing the right embroidery printing techniques will make all the difference.

Let’s walk through the process—step by step—from idea to finished masterpiece.
1): Choose Your Design
Begin with a clear, high-quality image or a well-defined vector graphic. If you’re working with a client, make sure the design is simple enough to read once stitched. For machine embroidery, you’ll need to digitize your design using embroidery design software—this process converts your artwork into a format your embroidery machine can understand and stitch accurately.
2): Select the Right Fabric
Different fabrics react differently to embroidery. Cotton, denim, and canvas are great for beginners as they hold stitches well, while stretchy or sheer fabrics need extra care. For embroidery custom clothing, choosing the right fabric is key to getting a clean, professional look. When in doubt, check fabric samples at an embroidery shop and ask experts for guidance.
3): Prepare the Fabric
This step can make or break your design. Use a stabilizer to prevent puckering and distortion, then hoop your fabric so it’s tight, smooth, and secure. Think of it as setting the stage for your custom embroidery design to shine.
4): Load the Design and Set Up the Machine
Once your design is turned into a digital embroidery file, upload it to the embroidery machine. Adjust your thread colors, needle type, and stitch density based on the fabric and design details. If you’re outsourcing, it’s smart to ask for a quote upfront—embroidery printing cost can vary based on stitch count, fabric, and complexity.
5): Test Stitch (Highly Recommended)
Before committing to the final piece, do a quick test run on a scrap piece of similar fabric. This helps spot problems with placement, thread tightness, or how clear the design looks. Trust me—this tiny step can save you big headaches later.
6): Final Stitching and Finishing Touches
Now it’s time to let the magic happen! Once the stitching is done, remove the hoop, trim any stray threads, and clean up the backing. If it’s for a customer order, adding finishing touches like pressing and neat packaging makes it look even more professional.
Pro Tips for Flawless Embroidery Printing
Want your embroidery to look sharp, last longer, and impress every time? Here are some tried-and-true tips that seasoned embroiderers swear by.

1. Always Test Before Final Stitching
Think of this as your embroidery dress rehearsal. Run a quick test stitch on a similar piece of fabric to check alignment, thread tension, and overall design clarity. It’s a tiny investment of time that can save you from expensive (and frustrating) do-overs.
2. Use High-Quality Threads
Threads are the star of the show, so don’t cut corners here. Cheap ones break easily, fray, and fade after a few washes. Go for high-quality polyester or rayon threads—they’re vibrant, durable, and worth the cost, especially if you’re charging a premium embroidery printing cost.
3. Get Comfortable with Your Embroidery Design Software
The more you know your software, the more creative freedom you have. You’ll be able to tweak stitch types, adjust density, and perfect placement with confidence. This skill really pays off when digitizing detailed logos or complex artwork.
4. Nail the Placement Every Time
Nothing ruins a great design faster than crooked placement. Use templates, rulers, or even laser guides to make sure your design sits exactly where it should—whether it’s a left-chest logo or a bold back design.
5. Finish Like a Pro
Once the stitching is done, give your work a proper polish. Trim stray threads, remove the stabilizer neatly, and press the fabric to make it look crisp. These small finishing touches turn your project from “handmade” to “high-end.”
Common Mistakes to Avoid in Embroidery Printing
Even experienced embroiderers run into challenges—but most mistakes are easy to avoid once you know what to watch for. Here are the most common embroidery pitfalls and how to prevent them:
1. Skipping Stabilizers
Stabilizers are your design’s safety net. Without proper backing, fabric can stretch or pucker, ruining your work. Choose the right stabilizer based on your fabric type to keep stitches smooth and secure.
2. Ignoring Stitch Count in Pricing
Embroidery pricing isn’t just about fabric and thread. More stitches mean more time, wear on your machine, and higher material use. Always factor in stitch count when quoting embroidery printing cost.
3. Choosing the Wrong Fabric
Thin, stretchy, or slippery fabrics can distort your design. Test on a sample first or consult an embroidery shop near you for fabric recommendations.
4. Overlooking Thread Tension
Incorrect tension causes thread breaks, loops, or uneven stitching. Regularly check and adjust tension to maintain clean, consistent results.
How Much Does Embroidery Printing Cost?
Embroidery gives custom apparel a premium, long-lasting finish—but it’s priced differently than surface printing because each design is stitched directly into the fabric. The final embroidery printing cost depends on a few factors.
What Affects the Cost?
-
Stitch Count – The more stitches in your design, the more time, thread, and machine work it takes.
-
Fabric Type – Cotton and canvas are easy to embroider; delicate or stretchy fabrics need extra care.
-
Design Complexity – A simple word or phrase can be done quickly, while detailed logos or artwork take longer and cost a bit more.
-
Quantity – Bulk orders lower the price per item.
Average Embroidery Printing Cost in the US
|
Order Type |
Estimated Cost per Item |
|
Small logo (under 5k stitches) |
$5 – $10 |
|
Medium design (10k–15k stitches) |
$10 – $20 |
|
Large or complex design (20k+ stitches) |
$20 – $35 |
|
Bulk orders (50+ items) |
$4 – $8 per item |
Prices can vary depending on your location, provider, and design. It’s always best to request a custom quote based on your exact needs.
Also Read: The Ultimate Guide To Custom Embroidered Clothing
FAQ Section:
Q1): Can embroidery be done without a machine?
Ans: Yes, embroidery can be done by hand. However, machine embroidery is recommended for professional results, faster production, and consistent quality—especially for custom apparel businesses.
Q2): What is digitizing in embroidery?
Ans: Digitizing is when you turn your design into a digital file that the embroidery machine can understand. It tells the machine what stitches to use, which way they should go, and how thick they should be.
Q3): Which fabrics are suitable for embroidery?
Ans: Cotton, canvas, denim, and polyester blends are ideal for embroidery. Thin or stretchy fabrics may require additional stabilizers to prevent distortion during stitching.
Q4): Is embroidery a good choice for branding?
Ans: Yes. Embroidery provides a professional and long-lasting finish, making it ideal for logos on workwear, promotional apparel, and custom merchandise.
Q5): How long does it take to complete an embroidery project?
Ans: The time depends on the design complexity and machine speed. Simple designs may take 15–30 minutes, while detailed logos can take longer.
Conclusion
Custom embroidery is more than just stitching fabric—it’s a craft that blends creativity, skill, and precision. Every step, from choosing the right tools to perfecting your technique, plays a role in the final result. While embroidery printing costs can vary depending on design complexity and fabric type, the durability and elegant finish make it a timeless choice for personal and professional projects.

Leave a comment
This site is protected by hCaptcha and the hCaptcha Privacy Policy and Terms of Service apply.